
A leaking water heater usually means high pressure, worn valves, loose fittings, or internal corrosion. Simple checks, fixes, and maintenance steps can restore one’s hot water supply and prevent damage—even if your water heater may be leaking from a small fitting or seam.
Key Takeaways
- Common causes include high pressure, faulty T&P or drain valves, corroded fittings, or internal tank rust; tankless units often develop a leak in your water heater at connections or gaskets.
- First, shut off the cold water to the heater and turn off the power or gas to stop inflow and ensure safety.
- Identify the leak location: bottom suggests tank or drain valve; top points to supply fittings; check T&P valve and lines for drips.
- Fixes include tightening fittings, replacing a leaking drain or T&P valve, adding an expansion tank, or flushing sediment; severe rust usually means replacement.
- Prevent future leaks by flushing twice yearly, testing the T&P valve, monitoring pressure, and inspecting the anode rod and supply lines.
Common Causes of a Water Heater Leak
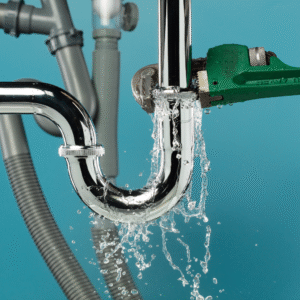
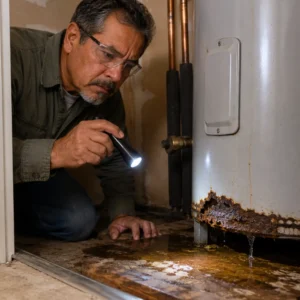
A leaking water heater often announces itself with warning signs like puddles, musty smells, or a slow drop in warm water performance.
The root cause can vary by unit type—tank, tankless, electric, or gas—each heater has weak points.
Key culprits include high water pressure stressing seams, discolored water indicating internal corrosion, and a loose fitting letting water escape. When neglected, even minor leaks from a hot water heater can cause severe water damage.
Signs of a Leaking Water Heater You Shouldn’t Ignore
Though a few drips may seem harmless, minor warning signs often indicate a water heater leak that can quickly worsen. Observers should note persistent water pooling, a leak from the bottom, or leaking from the top near fittings. A hissing pressure relief valve, rusty water at taps, or damp insulation are common signs that a hot water heater is leaking. Musty smells, peeling paint, or nearby water damage indicate hidden seepage. Early detection reduces repair costs and prevents mold.
| Sign | What it suggests |
|---|---|
| Water pooling | Active leak or condensation issue |
| Rusty water | Corrosion inside tank or pipes |
| Hissing at valve | Pressure relief valve malfunction |
| Damp base | Leak from the bottom or drain |
| Wet top fittings | Leaking from the top connections |
Causes of Water Heater Leaks in Different Types of Water Heaters
Leaks stem from where heat, pressure, and water meet—each water heater type has weak points.
Tankless water heaters often leak at connections, heat exchanger gaskets, or condensate drains, unlike traditional tank-style models that may leak from temperature and pressure relief valves or corroded fittings.
Tank-style units often drip from the temperature and pressure relief valve, a loose drain valve, or corroded fittings on water supply lines and the cold water inlet.
Leaks at the bottom of the tank usually signal internal corrosion or sediment damage, especially with the age of your water heater.
Tankless models more often leak at connections, heat exchanger gaskets, or condensate drains.
Heat pump hybrids can sweat into pans or leak at condensate lines and unions.
Solar-assisted systems may leak at collector loops or mixing valves.
How Water Pressure, Rusty Water, and Drain Valve Issues Cause a Water Heater to Leak
Building on where different heaters tend to fail, three everyday culprits often sit at the heart of a leak: high water pressure, rusty/discolored water signaling corrosion, and faulty drain valves. Excessive water pressure stresses seams, making a water heater tank sweat or split. Discolored water hints at internal corrosion or anode failure; pits can weep. A loose or cracked valve can drip steadily. If your water heater is leaking, verify pressure, inspect the valve, and consider flushing the tank before water heater repair.
| Issue | Quick Action |
|---|---|
| High water pressure | Test/adjust PRV |
| Rusty water | Check anode, tank |
| Drain valve drip | Tighten/replace |
| Sediment heat | Start flushing the tank |
| Persistent water heater leaking | Call water heater repair |
Identifying Where the Water Heater is Leaking From
Pinpointing the leak starts with noting whether water appears at the bottom or the top, which suggests different problems.
Next, a quick check of the cold and hot supply lines and the temperature and pressure relief valve can rule out familiar sources. Remember, leaks sometimes occur between the hot water and one of the cold inlet connections.
If those look fine, attention turns to the tank itself to trace seepage or corrosion points.
Water Heater Leaking from Bottom vs Top — Key Differences
A quick visual check can reveal whether a water heater leak is coming from the top or the bottom, and that distinction matters.
Puddles at the base of the water heater suggest a leak in your water heater from the bottom—often from a corroded water tank, valve seepage, or condensation.
Moisture around the top of the water heater points to fittings near the water outlet —typically one for hot water and one for cold, though some models use a combined inlet for water and one for cold expansion tanks.
Top leaks usually trace to loose connections; bottom leaks often indicate internal tank failure.
Noting these signs of a water heater helps decide urgency: if in doubt, shut off the water, document locations, and schedule repair promptly.
Checking the Water Supply Lines, Temperature, and Pressure Relief Valve
With the general location narrowed to top or bottom, attention turns to the most common culprits: the supply lines and the temperature and pressure (T&P) relief valve. A careful visual check helps pinpoint water leaking at fittings, flex lines, or the T&P discharge. First, inspect the water heater at the top of your water heater for drips on the hot and cold water connections. Ensure the valve on the cold water shutoff is tight. Confirm the temperature and pressure relief valve isn’t weeping.
| Checkpoint | Action |
|---|---|
| Water supply lines | Dry, tighten, or replace washers |
| Cold water shutoff | Snug packing nut; verify off/on |
| T&P valve body | Look for seepage at threads |
| Discharge pipe | Detect intermittent moisture |
| Unions connected to your water heater | Reseat and re-tape threads |
Tracing the Source of Your Water Heater Leak in the Water Heater Tank
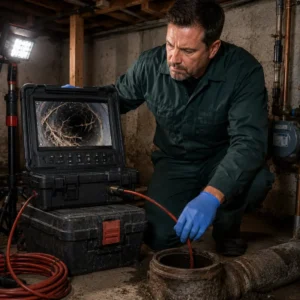
Although the fittings were checked out, the next step was to isolate leaks coming from the tank itself. The observer looks for the source of your water heater by drying surfaces, then watching where they first see water.
A puddle of water at the bottom of the water heater often points to internal tank failure, which can cause water to escape continuously. Moisture trails around your water heater can indicate seam or gasket issues that cause leaks.
- Check the drain valve for drips.
- Inspect the anode and element ports.
- Examine tank seams and insulation.
- Observe while heating cycles run.

How to Stop a Water Heater Leak Before It Causes Water Damage
This section explains how to shut off the cold water supply safely and stop the flow fast.
It covers quick actions to reduce hot water loss while keeping the area safe.
It also outlines emergency steps to limit leaks and protect floors, walls, and belongings.
Shutting Off the Cold Water and Stopping the Water Supply Safely
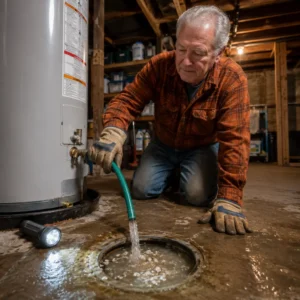
Before water spreads beyond the heater, the priority is to cut the inflow of cold water feeding the leak. When a water heater leaks, shutting off the water is the quickest way to prevent the heater from worsening.
Locate the cold-water shutoff valve near the water heater and turn it clockwise. Mind water and electricity; confirm the power and water supply are off before touching anything else. If needed, empty the water tank to reduce pressure and drips.
- Identify the cold inlet valve on top.
- Turn the handle or lever clockwise.
- Verify water supply stops.
- Cut electrical or gas power.
Dealing with a Leaking Water Heater to Minimize Hot Water Loss
Act quickly to contain the leak and protect the home.
Place towels or a pan near your water heater to collect drips and direct water to a drain. Reduce demand for hot water to minimize tank refill and pressure.
Check the temperature setting; lowering it can help stop rapid cycling that sometimes causes a water heater to leak.
Inspect connections and the drain valve for slow seepage. Note where water appears to pinpoint the source. Document any water damage to your home.
If corrosion or repeated leaks occur, plan to replace your water heater. Seek timely service to prevent larger repairs and disruptions.
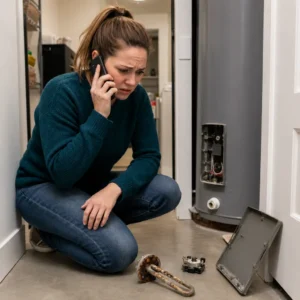
Emergency Steps to Stop a Water Heater from Leaking and Protect Your Home
Start by making the area safe and slowing the leak. If a water heater is leaking, cut power: switch off the breaker for an electric water heater, or set the gas water heater to “pilot.”
Close the cold-water shutoff valve to stop a leak and limit leaking water. Keep people away from water near outlets or flames. Place towels, a pan, or a bucket to contain drips, then call a pro.
- Turn off power/fuel safely.
- Close the cold-water inlet valve.
- Open a hot tap to relieve pressure.
- Document leaks and protect belongings with plastic, towels, or a wet/dry vacuum.
How to Fix a Leaking Water Heater
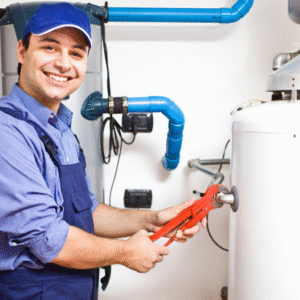
Fixing a leaking water heater starts with simple checks of the drain valve and the temperature and pressure relief (T&P) valve, which are familiar leak sources.
Next, it outlines repair options for minor issues versus signs that call for a full replacement.
It also summarizes typical fixes for tank leaks and when a failing tank means the unit has reached the end of its life.
Fixing a Leak in the Water Heater Drain Valve or Pressure Relief Valve
Although a leaky water heater can be alarming, pinpointing whether the drain valve or the temperature and pressure (T&P) relief valve is the culprit is the first step.
A leak in the water heater often comes from a loose drain valve cap or a failing pressure relief valve that opens to allow water and steam to discharge.
Either issue with a gas or electric water unit can be simple to fix, and ignoring water heater leaks can cause damage to the water heater.
- Tighten or replace the valve cap and add thread tape.
- Flush debris from the pressure relief valve.
- Replace a faulty T&P valve.
- Verify system pressure and expansion tank.
When to Try a Water Heater Repair vs Replace Your Water Heater
When should a leaking water heater be repaired instead of replaced? A repair makes sense if the leak stems from fittings, valves, or a loose connection. That common cause of water heater leaks is inexpensive to fix.
However, the type of water heater, age, and corrosion matter. Rusty tank seams, recurring puddles, or discolored water are signs your water heater might be near failure. The water heater may be beyond economical repair if it’s 10–12 years old.
Consider energy efficiency and warranty. Extending the life of your water heater is good, but replacing the water heater is wiser when repairs repeat or you need a new water heater.
Preventing Future Water Heater Leaks
Preventing the subsequent leak starts with simple maintenance habits that address common causes.
Regular checks of water pressure, the TPR valve, and supply lines help catch minor issues early.
Watching for warning signs—discolored water, rumbling noises, or rising energy bills—can also signal it’s time to replace the unit before damage occurs.
Maintenance Tips to Avoid the Water Heater Leaks
Although leaks seem sudden, most start as minor, preventable issues that routine care can catch early.
A water heater benefits from simple habits that reduce stress on parts and seams. When water may pool or fittings loosen, minor drips can cause water damage.
These steps help when dealing with a leaking water unit—or preventing one—so hot water and steam stay contained and the water heater isn’t overworked.
- Flush sediment twice yearly to bring water into the tank cleanly.
- Test the T&P valve; replace if sticky or weeping.
- Inspect anode rod; swap if heavily worn.
- Tighten accessible fittings and the drain cap.
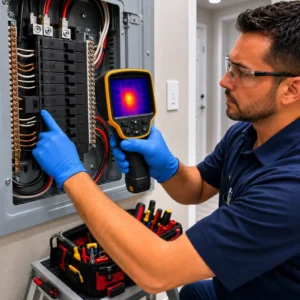
Monitoring Water Pressure and Water Supply Lines Regularly
Routine care sets the stage, and the next safeguard is keeping an eye on water pressure and the supply lines feeding the heater. A simple gauge on a hose bibb confirms if water stays near 50–60 psi.
Pressure higher than that strains the tank, valves, and joints. Inspect flexible connectors for kinks, corrosion, or damp spots. Verify tight shutoffs for hot and one for cold.
Check dielectric unions on electric water heaters and vent clearances near gas water heaters. Replace worn valves and supply lines with new water-rated parts.
Annual checks bring water risks down and help the heater last.
Signs Your Water Heater Might Need Replacement Before Leaking Water Damage Happens
When should a water heater be replaced before it causes a mess? A cautious homeowner watches for minor warnings that come before leaks. Subtle changes often signal the end of life and help preserve water heater reliability. Spotting them early prevents ceiling stains, floor damage, and emergency calls.
Consider these tells:
- Age 10–12 years (tank) or 15+ (tankless): efficiency falls; risk rises.
- Rust-colored hot water or a metallic taste: tank corrosion likely means hot water, and one of the tank’s internal parts has failed.
- Rumbling or popping: sediment hardened; stress and leaks are more likely.
- Frequent resets, inconsistent water temperature, and a rising energy bill: signs of failing elements, sensors, or a thermostat.
Conclusion
A few common issues usually cause a leaking water heater; quick action can help limit the damage. Most homeowners can restore hot water by identifying the leak source, shutting off power and water, draining the tank, and tightening or replacing faulty parts. A licensed pro is best when leaks involve the tank itself or gas components. Routine maintenance—flushing sediment, testing the TPR valve, and checking anode rods—helps prevent future leaks and keeps hot water reliable.

")