
Replacing a water heater efficiently begins with recognizing signs of failure, like inconsistent water temperature and persistent leaks. Prepare by safely draining, disconnecting, and removing the old unit. Make certain the water heater is installed following building codes, with secure connections and proper electrical or gas configurations. Conduct tests for leaks and confirm ideal temperature settings. Regular maintenance extends the unit’s life and minimizes sediment. Learn these systematic steps for a hassle-free replacement process—perfect for anyone interested in home improvement or a DIY water heater project. This guide covers everything you need to know to get hot water reliably.
Key Takeaways
- Shut off the power and water supply before beginning the water heater replacement process.
- For a smooth removal, connect a garden hose to the water heater’s drain valve and empty the tank.
- Disconnect all plumbing and electrical connections carefully to avoid any damage during removal.
- Install the new water heater in compliance with the manufacturer’s instructions and local building regulations.
- Test for leaks and ensure proper hot water performance after installation to confirm successful replacement and satisfy your water heater needs.
- Proper installation ensures your Heater and installation process are smooth and effective.
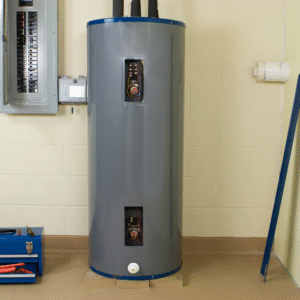
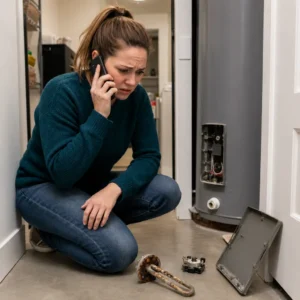
How Do You Know It’s Time for a Water Heater Replacement?
To determine when replacement is necessary, look for signs such as inconsistent water temperature, unusual noises, or visible leaks around the unit.
Typically, a water heater has a lifespan of 8 to 12 years, after which efficiency diminishes, and the likelihood of failure increases.
Monitoring these indicators can help in planning a timely and effective replacement, ensuring continued access to reliable hot water.
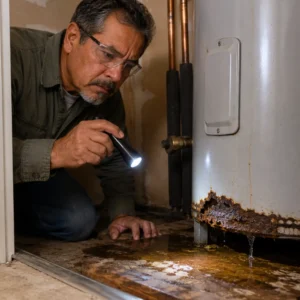
What Signs Indicate You Need to Replace a Water Heater?
When exactly is it time to replace a water heater? Key indicators include the age of your water heater, which typically lasts 10-15 years.
An existing water heater often shows signs like reduced hot water supply, as water isn’t as hot, or sporadic temperature changes.
Additionally, examine for any leaks or water pooling around the unit. Pay attention to the pressure relief valve for any malfunction.
These problems can occur in both electric and gas water heaters. Persistent signs usually indicate that maintenance or replacement is necessary to ensure consistent and efficient hot water at home.
How Long Does a Water Heater Last Before You Should Replace It?
How long does a water heater truly last before it requires replacement? Tankless water heaters can last 15-20 years, depending on maintenance, while traditional models last 8-12 years. However, factors such as water quality and maintenance affect longevity. When the water heater tank corrodes or leaks, it’s time for a replacement. Upgrading ensures better efficiency and reliability. Monitor the current water heater for signs of deterioration.
| Factor | Impact on Longevity |
|---|---|
| Water Quality | High mineral content shortens lifespan |
| Maintenance | Regular upkeep extends life |
| Usage | Frequent use reduces lifespan |
| Type | Traditional vs. tankless |
| Age | Over 10 years signals replacement |
Evaluating these factors helps determine if additional water or your water heater needs require a replacement, and how water heaters can last longer with proper care.
How Do You Prepare to Remove the Old Water Heater?
Before removing an old water heater, it is essential to first verify that it is safely drained to prevent any water damage or hazards.
Begin by switching off the power, then attach a hose onto the drain valve to direct the water to a proper drainage location.
Additionally, proper disconnection of plumbing and electrical connections is necessary, along with careful removal of the heating element, to guarantee a smooth and risk-free removal process.
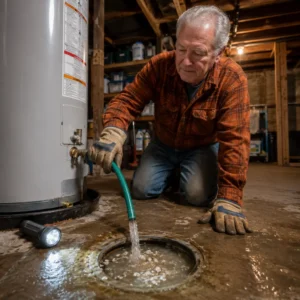
What Are the Steps to Drain the Water Heater Safely?
Draining a water heater safely is a critical step in the removal process and requires careful attention to detail.
First, shut off the cold water valve to stop incoming water.
Attach a garden hose to the tank’s bottom drain valve, guiding the other end to a secure drainage spot. Open the valve to allow the water to flow out, ensuring it is not hot.
If water flow is insufficient, open a hot water tap to introduce air into the system.
A water pump may assist if you need to drain the tank faster.
Detach the cold water line once empty.
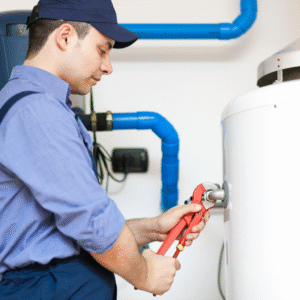
How Do You Remove the Old Water Heater Without Risk?
Once the water heater is fully drained, ensuring safety during its removal is paramount.
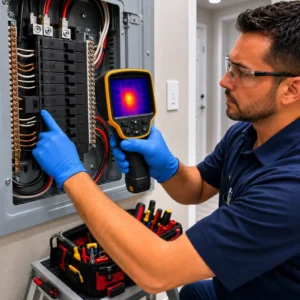
Start by cutting off the power: switch off the electricity at the circuit breaker or close the gas valve for gas water heaters.
Next, close the cold water supply valve to prevent accidental flooding.
Detach the water lines, carefully unscrewing connections at the inlet and outlet points.
Open the pressure relief and drain valves to safely release any leftover water pressure.
Detach any water pipes attached to the Heater.
Securely cap gas lines, if applicable, to prevent leaks.
With all connections safely undone, proceed to remove the old water heater.
How Do You Take Off the Heating Element Properly?
Always power off the water heater and disconnect it from all electrical sources before removing the heating elements.
Next, drain the tank water heater by turning on the hot water faucet and allowing the water to flow.
Employ a water heater element wrench to unscrew the element from the tank. Carefully extract it, ensuring no damage to the surrounding area.
Once the new hot water heater installation is completed, turn on the cold water to fill the tank, then restore power to the water heater.
Finally, turn on the hot water to verify functionality.
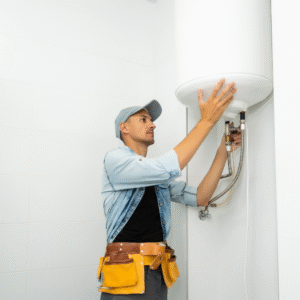
How Can You Install the New Water Heater Correctly?
To install the new water heater correctly, begin by positioning the unit in a suitable location and ensuring it adheres to local building codes.
For gas models, attach the gas supply line and venting system, carefully checking for leaks, while electric models need to be correctly wired to the power source. Make sure to check all connections for water heater leaking after installation, as improper sealing can lead to water damage.
Regardless of the type, both installations necessitate securely connecting the water inlet and outlet lines, followed by filling the tank and performing a thorough system test.
What Are the Steps to Install the New Water Heater?
Successfully installing a new water heater involves several detailed steps that require careful attention to ascertain proper functioning and safety. First, select a new water heater appropriate for the home’s water usage needs. Upon acquiring the unit, replace the water heater by removing the old one and positioning the new hot water heater securely. Confirm that the cold water intake and hot water outlet are correctly attached. Next, connect the gas line, ensuring all fittings are tight. After turning on the gas, inspect for leaks.
| Step | Action |
|---|---|
| Selecting Heater | Assess water usage needs |
| Connecting Lines | Secure gas and water |
| Final Checks | Inspect for gas leaks |
Choose a water heater like your previous one (or an upgrade), then follow detailed instructions for connection and testing.
How Do You Replace Your Gas Water Heater vs Electric Model?
When considering how to replace a gas water heater compared with an electric model, it is essential to understand the distinct installation requirements for each type.
For a gas hot water heater, verify the gas valve is off before removing the unit. Connect the new water heater’s gas line securely, checking for leaks. For a tankless water heater, always adhere to the manufacturer’s installation instructions.
In contrast, an electric model requires confirming that power is disconnected. Connect the wires to the new unit, securing the water inlet and outlet.
How Can You Maintain Your New Water Heater for Longevity?
Routine maintenance and preventive care are essential for ensuring the long life of a newly installed water heater.
Preventing leaks during the replacement process is essential, which can be achieved by properly sealing all connections and using quality materials.
Additionally, recognizing when a complete replacement is necessary, such as when the unit displays significant rust or inefficiency, can prevent costly repairs and extend the overall lifespan of the appliance.
How Do You Prevent Leaks During Water Heater Replacement?
Confirming a watertight installation begins with a careful inspection of all connections and fittings before proceeding with the replacement process.
Examine the drain valve and make certain it is tightly sealed. When installing a new water heater, particularly a tankless water heater, verify that all hot water lines and fittings are secure to prevent leaks.
Use Teflon tape on threaded connections to enhance the seal. Before installation, replace any hoses or fittings that are worn or damaged.
During the process, periodically check for leaks by running hot water through the system. Properly aligning and tightening each component is essential for a leak-free setup.
When Is It Necessary to Replace Your Water Heater Completely?
Why might a homeowner need to contemplate completely replacing their water heater? Several signs indicate the necessity to replace a water heater.
If the water heater fails to meet hot water needs, producing only lukewarm water, it might be time to buy a new water heater. Insufficient hot water could result from a failing water tank, which is unable to sustain the household’s hot water usage.
Aging units often struggle with maintaining the desired amount of hot water. Persistent issues with getting enough hot water or frequent repairs suggest the need for a new heater to efficiently fulfill the home’s hot water demands.
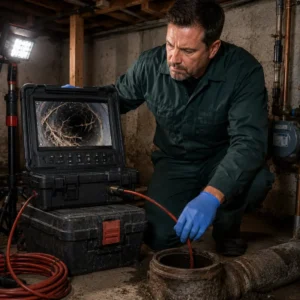
What Tools and Tips Make Water Heater Replacement Easier?
To facilitate a seamless water heater installation, utilizing the correct tools, such as pipe wrenches, a multimeter, and a pipe cutter, is essential.
Ensuring the longevity of the unit’s heating component requires periodic inspection and cleaning to prevent sediment buildup, which can impede efficiency.
After installation, testing hot water performance can be achieved by measuring water temperature at the tap to confirm it aligns with the thermostat settings.
How Can You Take Care of the Heating Element for Long-Term Use?
Maintaining the heating element of a water heater for long-term use involves regular inspection and preventive care to secure peak performance.
Start by shutting off the water heater’s power supply. Open a hot water tap to relieve pressure and aid drainage. Then, use the drain valve to empty the tank, ensuring sediment does not build up on the internal components.
Clean the tank with soapy water if needed. Periodically, inspect the component for wear or corrosion and replace it promptly to guarantee consistent hot water availability.
These maintenance steps help provide water on demand and prolong the heater’s lifespan.
How Do You Test Hot Water Performance After Installing a New Water Heater?
First, ascertain that the water heater is filled by opening a hot water tap until a steady flow is achieved. This prevents damage to the heating elements.
Next, verify the top of the water heater for leaks in lines and the water connections.
Use a thermometer to measure the temperature of hot water at various faucets, confirming it meets the desired setting, typically around 120°F.
If performance issues persist, check if the existing water lines need to replace or adjust to optimize heater efficiency.
Conclusion
In summary, replacing a water heater requires careful assessment and preparation to guarantee a seamless changeover. Recognizing the signs of a failing unit, gathering the necessary tools, and following precise installation steps are essential for success. Adhering to maintenance practices extends the new Heater’s lifespan, while utilizing helpful tips and tools simplifies the process. By methodically addressing each phase, individuals can achieve efficient and effective replacement of water heater, ensuring a reliable hot water supply and system longevity.

")