
Removing an old garbage disposal without causing damage requires careful attention to safety and procedure. Begin by turning off the power at the circuit breaker to eliminate the risk of electric shock. Gather essential tools: a screwdriver, an adjustable wrench, and a bucket. Disconnect the drain pipe and disposal unit by loosening screws and nuts with precision. Inspect components for wear, applying gentle pressure to avoid straining plumbing. What follows is a systematic approach that guarantees smooth removal without complications.
Key Takeaways
- Shut off power at the circuit breaker and confirm power is off before beginning removal.
- Use a bucket to catch residual water when disconnecting the drain pipe.
- Loosen and remove the nuts connecting the drain pipe and mounting ring carefully.
- Inspect and clean the sink flange and plumbing connections for damage or debris.
- Consider hiring a professional if the unit is old, corroded, or if electrical work is required.
How to Remove a Garbage Disposal from Your Kitchen Sink
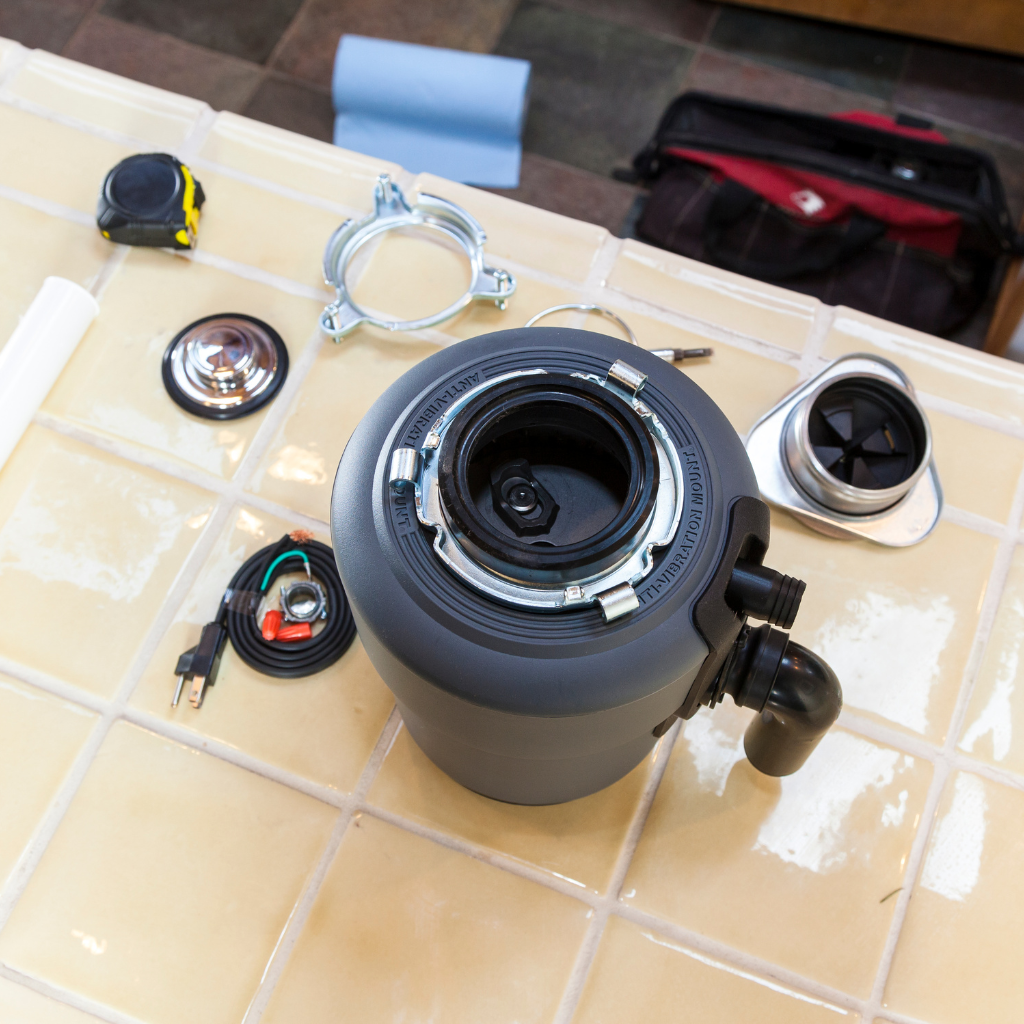
To remove a garbage disposal from a kitchen sink, one must first gather essential tools, including a screwdriver, an adjustable wrench, and a bucket for catching water.
The next step involves carefully disconnecting the drain pipe by loosening the slip nuts and making certain that the power supply is turned off to prevent electrical hazards.
If the unit is particularly corroded or if there is uncertainty about handling plumbing connections, it is advisable to hire a professional plumber to guarantee safe and efficient removal.
What tools are needed to remove a garbage disposal from the sink?
When preparing to remove a garbage disposal from the sink, one should gather an array of essential tools to guarantee a smooth and safe process.
A pipe wrench is vital for loosening and disconnecting tight plumbing connections. A flathead screwdriver will aid in removing screws from the mounting assembly that secures the disposal unit. For handling electrical components safely, make sure the power is disconnected before proceeding.
Needle-nose pliers can assist in gripping and maneuvering smaller parts. Additionally, a non-contact voltage tester is recommended to verify the absence of electrical current.
Use caution to avoid damage to surrounding pipes and components, making certain all tools are in good condition and appropriate for the task. Proper preparation helps facilitate a seamless removal process.
How do you disconnect the drain pipe from an old garbage disposal?
Begin the process of disconnecting the drain pipe from an old garbage disposal by verifying that the power supply to the unit is safely turned off to prevent accidental activation.
Position a bucket beneath the sink to catch any residual water. Using a wrench, carefully loosen the nut connecting the drain pipe to the disposal. Unscrew this connection fully, allowing the drain pipe to be detached.
Next, focus on the plumb trap connected to the sink drain. Loosen the nut securing the trap with the wrench, and remove it to verify clear access. Handle all components with care to avoid damage.
Upon successful garbage disposal removal, inspect the drain pipe for any wear or damage that may require attention before reassembly.
When should you hire a plumber to help remove a garbage disposer?
Removing a garbage disposer can be a straightforward task, but at what point should one consider hiring a professional plumber? If the disposer is old and corroded, or if there are issues with the mounting ring or sink flange, professional assistance is advisable.
Complexities with the drain or plumbing system, such as leaks or misalignments, also warrant a plumber’s expertise.
Additionally, if electrical connections seem intimidating, especially when dealing with a circuit breaker, it is prudent to seek professional help to avoid hazards.
A plumber can guarantee the safe disconnection of the disposer, maintain the integrity of the plumbing system, and prevent potential damage. Hiring a professional is essential when the task exceeds basic DIY capabilities, ensuring safety and efficiency.
What to Know Before Disconnecting an Old Garbage Disposal Unit
Before disconnecting an old garbage disposal unit, it is critical to guarantee the power supply is completely shut off at the circuit breaker to prevent electrical hazards.
To safely loosen and unscrew the disposal mounting ring, use an adjustable wrench while supporting the unit to avoid sudden drops.
Disconnecting the electrical wire setup requires careful removal of the wire nuts and securing the wires with electrical tape to guarantee no exposed wires remain.
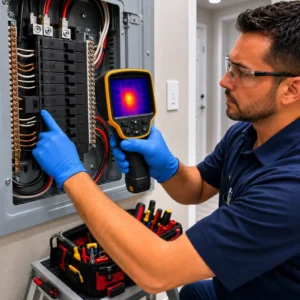
Why must you shut off electrical connections before garbage removal?
Safety is paramount when dealing with electrical appliances, and this holds particularly true for disconnecting an old garbage disposal unit. Before initiating any electrical work, one must first shut off the power to the disposal. This vital step involves locating the appropriate breaker box and switching off the breaker that supplies voltage to the disposal unit.
Failure to do so could result in severe electrical shock or injury. Once the breaker is off, confirm there is no power by attempting to turn on the disposal.
Next, safely remove the cover plate to expose the wires. Carefully detach the wires, using wire nuts to secure any exposed ends, ensuring no accidental contact occurs. Properly managing the electrical connections is essential for a safe removal process.
How do you safely loosen and unscrew an old disposal mounting ring?
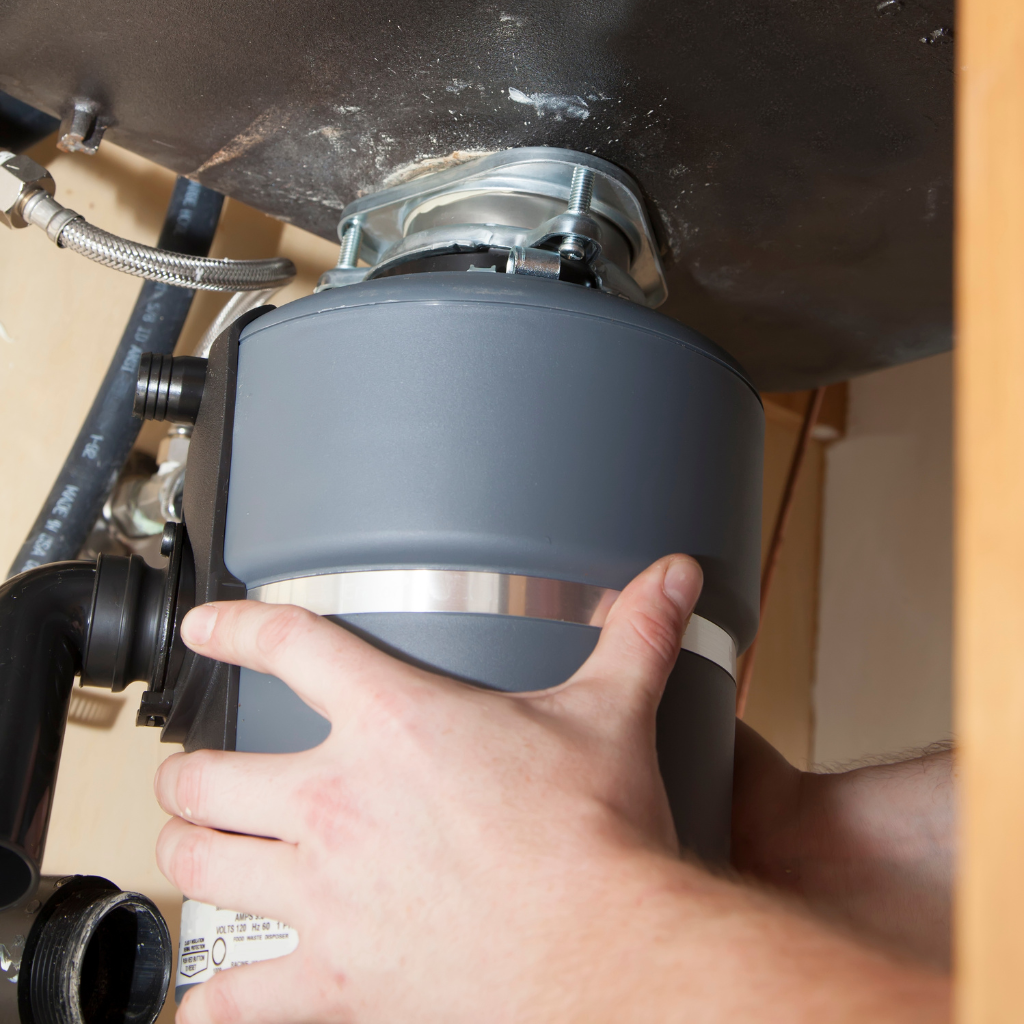
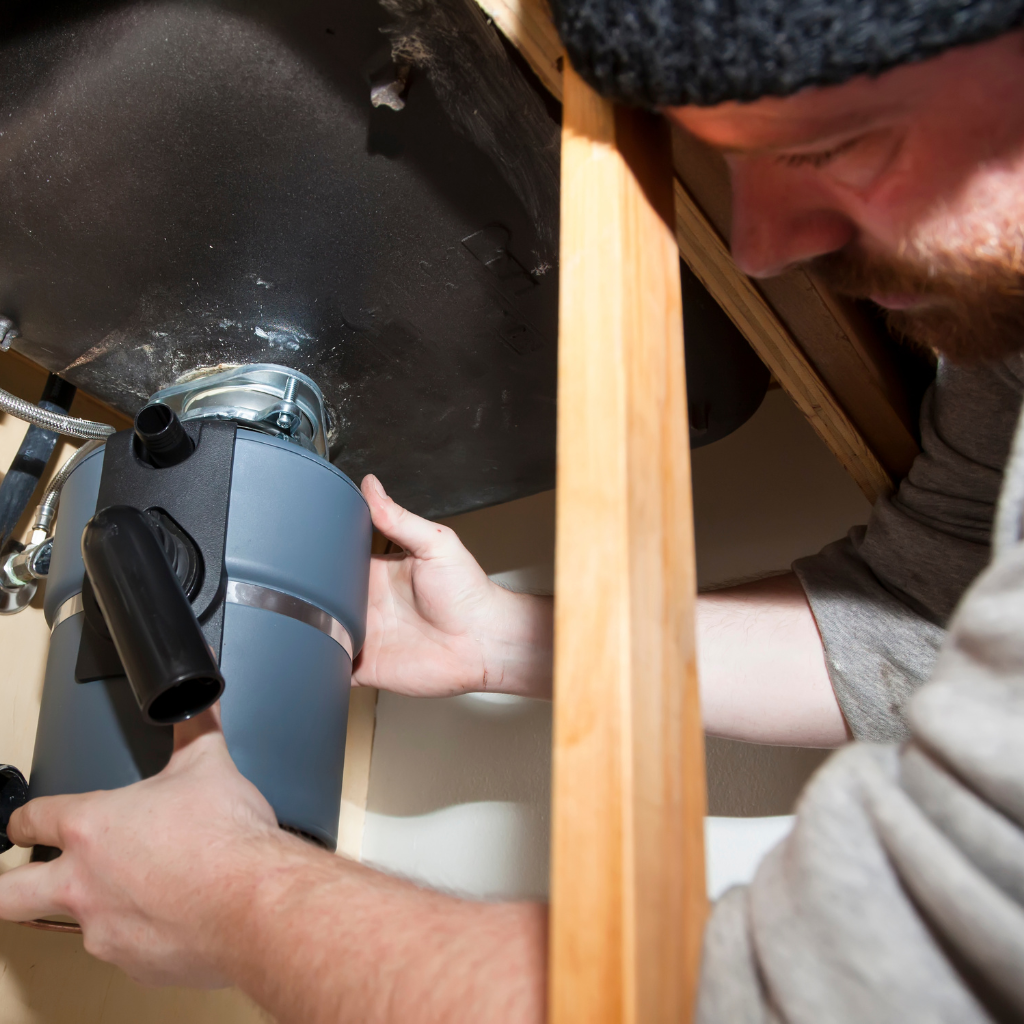
Once the electrical connections are safely managed, attention shifts to the mechanical aspects of detaching the old garbage disposal. Begin by applying penetrating oil to the mounting assembly to facilitate movement. Use a screwdriver to loosen the hose clamp counterclockwise. Verify that the disposal is securely supported to prevent accidental drops. Next, identify the snap ring, which holds the assembly in place, and use leverage with a screwdriver to gently pry it free. Follow this step-by-step process with precision to avoid damaging surrounding components.
| Step | Action |
|---|---|
| 1 | Apply penetrating oil to mounting assembly |
| 2 | Loosen hose clamp counterclockwise |
| 3 | Verify support of the disposal |
| 4 | Locate and detach the snap ring |
| 5 | Use screwdriver for leverage |
Proceed with caution to remove the disposal safely.
What is the correct way to disconnect the electrical wire setup?
Approach the task of disconnecting the electrical wiring of an old garbage disposal with caution, guaranteeing that all safety protocols are meticulously followed.
Begin by turning off the power at the circuit breaker to prevent electrical shock. Use a voltage tester to confirm the absence of electricity.
Locate the junction box on the disposal; remove the cover to access the wire connections. Unscrew the wire nuts and carefully disconnect the wires. If uncertain, consider enlisting help from a pro to guarantee safe removal and future install of a new unit.
Proper disposal of the appliance is vital. Remember, integrating plumbing and electrical knowledge is essential for a DIY approach, but don’t hesitate to call a professional if needed.
How to Replace a Garbage Disposal Without Damaging Plumbing
To replace a garbage disposal without damaging plumbing, begin by disconnecting the unit from the dishwasher by loosening the clamp connecting the dishwasher hose to the disposal inlet.
Next, verify that the power supply is turned off and detach the disposal from the mounting assembly by rotating it counterclockwise, using a suitable tool for leverage if necessary.
Carefully support the disposal while disengaging it from the plumbing system to prevent strain on the pipes, and follow safety precautions by wearing protective gloves. Once removed, you’re ready to install a garbage disposal by aligning the new unit with the existing mounting hardware and reconnecting the necessary components.
How can you easily remove the disposal unit connected to a dishwasher?
Disconnecting a garbage disposal unit connected to a dishwasher requires careful execution to prevent damage to the plumbing system.
Begin by ensuring the power is disconnected to avoid an electric shock. Locate the dishwasher connector, usually attached to the disposal pipe, and use a screwdriver to loosen the clamp securing it. Carefully detach the pipe, being cautious to prevent any leaks.
Next, focus on the bolts connecting the garbage disposal to the sink’s mounting assembly. Use a wrench to unscrew these bolts, ensuring a firm grip to avoid slipping.
Once loosened, the disposal unit can be gently removed. This process should be executed with proper safety precautions to maintain the integrity of the plumbing and avoid unnecessary damage.
How do you remove the disposal from the existing plumbing system?
Once the dishwasher connection has been addressed, attention should be directed towards detaching the garbage disposal from the existing plumbing system.
Begin by turning off the power supply to guarantee safety. Locate the three bolts on the mounting ring connecting the old garbage disposal to the sink drain. Carefully unscrew these bolts to release the unit from the mounting tabs.
Detach the disposal from the U-shaped pipe, making sure not to damage the drainpipe. Inspect the joint for remnants of old plumber’s putty and debris, cleaning thoroughly to prevent leaks.
Proceed cautiously to prevent any damage to the sink when removing a garbage disposal. Finally, dispose of the old unit according to local regulations, maintaining environmental compliance.
What DIY Steps Help Remove an Old Disposal from the Sink Safely?
To safely begin a DIY garbage disposal removal, it is essential first to disconnect the power supply to prevent electrical hazards.
Inspect the drain and sink flange for any signs of wear or damage to guarantee a secure installation of the new unit. After replacing the disposal, verify that the mounting is properly connected and tightened to avoid leaks or mechanical failure.
Where do you begin when planning a DIY garbage disposal removal job?
When starting on a DIY garbage disposal removal project, where does one begin to secure safety and efficiency? The planning of a DIY job involves familiarizing oneself with the disposal removal process.
Key initial steps guarantee a smooth operation:
- Inspect old disposal: Visually examine the unit for wear or damage before proceeding.
- Place a bucket: Position it beneath the drain hole to catch any residual water or debris.
- Disconnect pipes: Carefully detach the plumbing connections using appropriate tools to prevent leaks.
- Using a screwdriver: Loosen mounting hardware to facilitate removal.
Handling the job with these easy steps minimizes potential damage.
Why is it important to inspect and plumb the drain and sink flange?
Before removing an old garbage disposal, inspecting and plumbing the drain and sink flange is essential for guaranteeing a secure and efficient operation.
First, examine the sink flange to confirm it is free of cracks and tightly sealed, preventing leakage during the removal process. Check the drainage pipes to connect properly without corrosion or blockage, guaranteeing efficient water flow.
It is vital to plumb the pipes to connect these components, maintaining the integrity of the plumbing system. Tighten any loose connections to avert water spills and potential damage.
Proper inspection before starting the task helps identify any necessary repairs, facilitating a smoother shift when you replace a garbage disposal. These steps guarantee safety and efficiency in the removal process.
How do you connect or tighten the mounting after replacing a disposal?
Securing the mounting assembly after replacing a garbage disposal is a critical step in guaranteeing stability and functionality.
Begin by aligning the new disposal with the sink flange, ensuring that the mounting ring fits snugly around the flange. Use a screwdriver to tighten the mounting screws evenly, maintaining a balanced and secure attachment.
It is essential to check that all connections are tight and free from potential leaks.
- Confirm the mounting ring is properly aligned with the sink flange.
- Use a screwdriver to tighten screws incrementally, preventing uneven pressure.
- Verify that the disposal unit is securely attached to avoid vibrations.
- Double-check all connections to confirm they are leak-proof and secure.
Following these steps will help maintain the disposal’s structural integrity and operational efficiency.
How Do Pros Remove Old Garbage Disposals in an Easy Step-by-Step Way?
Professionals start by disconnecting the power supply to guarantee safety before addressing the removal of the garbage disposal from the drain pipe setup.
Utilizing the appropriate tools, such as a hex wrench, they methodically unscrew and loosen the mounting hardware while maintaining the integrity of the sink flange.
The process involves a series of strategic steps, including securing the unit, disengaging the mounting ring, and carefully lowering the disposal to prevent damage to surrounding components.
What’s the correct way to remove an old disposal from a drain pipe setup?
Removing an old garbage disposal involves a methodical process to guarantee safety and prevent damage to the plumbing system.
First, disconnect the power supply to the garbage disposal. Protect the sink area by placing a towel beneath to catch any water residue.
Carefully unscrew the nut connecting the drain pipe to the old disposal. Use a wrench for a secure grip and avoid damaging the threads.
Gently pry the old disposal away from the mounting bracket, making sure no strain the sink or pipes.
- Disconnect power supply: Verify safety by turning off electrical connections.
- Protect the sink area: Use a towel to catch water and debris.
- Unscrew the drain pipe connection: Carefully remove nuts and screws.
- Pry away old disposal: Detach without straining plumbing.
Prepare the area for a new disposal installation.
How does a pro unscrew and loosen a disposal from the mounting hardware?
After disconnecting the power and securing the sink area, the next step involves addressing the disposal’s connection to the mounting hardware. You’ll need to remove the disposal by first locating the mounting ring. Use a screwdriver to rotate the disposal counterclockwise to loosen it from the mounting assembly. This process requires careful handling to prevent damage to the sink flange. Remember, support the old garbage disposal with one hand to prevent it from falling.
Here is a quick overview of tools and steps:
| Step | Tool Needed | Action |
|---|---|---|
| 1 | Screwdriver | Loosen mounting screws |
| 2 | Hands | Rotate disposal counterclockwise |
| 3 | Hands and caution | Support and remove disposal |
This approach guarantees the safe removal of the garbage disposal from the sink.
What are the easy steps to remove a garbage disposal like a plumber?
Begin by guaranteeing the electrical circuit that powers the garbage disposal is turned off at the breaker box to prevent accidental activation.
Next, disconnect the unit from the sink and plumbing system. Plumbers follow these precise steps:
- Detach the Discharge Pipe: Use a wrench to unscrew the bolts connecting the discharge pipe to the disposal unit, allowing for easy removal.
- Loosen the Mounting Assembly: Rotate the locking ring counterclockwise, releasing the disposal from the mounting bracket.
- Remove Electrical Connections: Open the access panel, disconnecting wires safely using a screwdriver to avoid electrical hazards.
- Disconnect the Dishwasher Hose: If applicable, detach the dishwasher hose from the disposal unit by loosening clamps.
These systematic actions guarantee safe and efficient disposal removal without damaging adjacent plumbing or electrical components.
Conclusion
In summary, safely removing an old garbage disposal requires meticulous attention to detail and adherence to safety protocols. Begin by disconnecting the power at the circuit breaker and verifying the unit is inoperative. Utilize a screwdriver, adjustable wrench, and bucket to methodically detach the drain pipe and mounting assembly, guaranteeing all nuts and screws are carefully loosened. Inspect for wear and handle components with care to prevent plumbing damage. Following these steps guarantees a smooth and damage-free disposal process.


")