
Installing a garbage disposal involves removing the old unit, preparing the sink flange, and securing the new device. It requires precision and attention to detail, especially when handling plumbing and electrical connections. Confirming safety by turning off water and power is vital. Key steps include applying plumber’s putty, aligning the disposal with the mounting assembly, and wiring it correctly. To master these steps and guarantee a seamless installation, one must understand each phase thoroughly.
Key Takeaways
- Disconnect the power and water supply before removing the old disposal to ensure safety.
- Apply plumber’s putty around the sink flange for a watertight seal during installation.
- Securely attach the disposal unit to the mounting assembly by rotating it counterclockwise until it locks.
- Connect electrical wires and test the disposal switch for proper operation.
- Test for leaks and disposal functionality by running water and grinding biodegradable waste.
How to Prepare for the Garbage Disposal Installation Process?
To guarantee a seamless installation of a new garbage disposal, it is vital to first properly remove the existing unit by disconnecting electrical connections and plumbing components.
Following this, the correct installation of the flange and sink flange is essential, as these elements guarantee a secure fit and prevent leaks.
Using plumber’s putty during the installation of the drain flange serves as a necessary sealant, providing a watertight bond between the flange and sink drain.
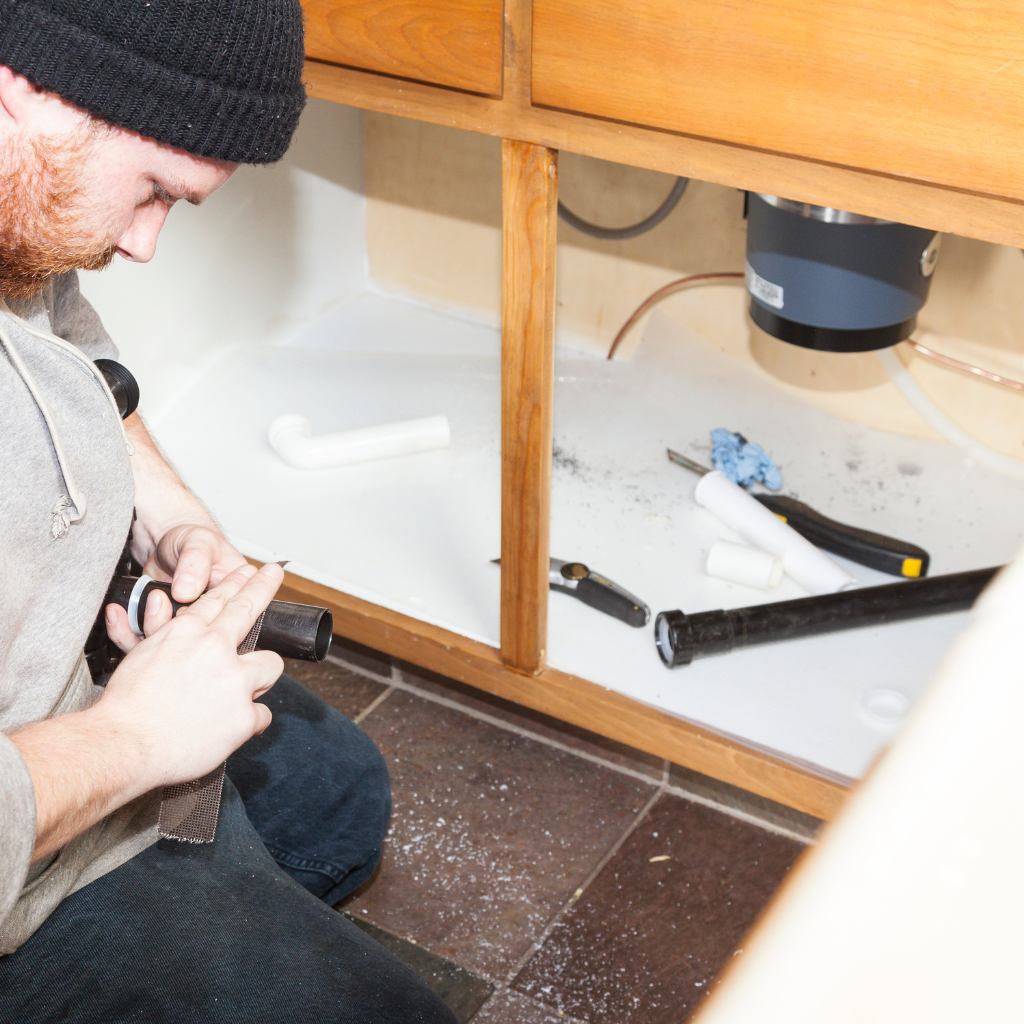
How do you remove the old disposal before installing your new one?
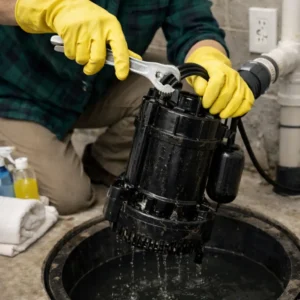
Removing the old garbage disposal is an essential step before installing a new one. Begin by disconnecting the power supply to the old disposal to guarantee safety. Underneath the sink, locate the drain pipe and unscrew it. Carefully remove the old disposal by detaching the mounting ring. Use a wrench to unscrew the mounting assembly. Remove the drain flange and the plumber’s putty surrounding it. The following table outlines the necessary steps:
| Step | Action | Tools Required |
|---|---|---|
| 1 | Disconnect the power | None |
| 2 | Unscrew and remove drain pipe | Wrench |
| 3 | Remove mounting ring and drain flange | Screwdriver, Wrench |
Confirm all components are properly detached and cleared before proceeding with the new installation.
What is the correct way to install the flange and sink flange?
Installing the flange and sink flange requires precision to guarantee a secure fit for the garbage disposal. Begin by applying a bead of putty around the sink flange. Insert the flange into the drain hole, making sure it seats evenly.
From the bottom of the sink, attach the rubber gasket and the metal backup ring onto the flange’s threaded end. Follow the step-by-step installation instructions to position the mounting ring over the flange.
Carefully tighten the screws on the mounting ring to secure the assembly. Make certain the flange remains centered throughout the tightening process to prevent leaks.
This precise installation of the flange and sink flange is essential for a stable, leak-free connection between the sink and the garbage disposal.
Why use putty when sealing the drain flange to the sink drain?
Guaranteeing a leak-free connection between the sink and garbage disposal involves using plumber’s putty when sealing the drain flange to the sink drain. This step is essential in any garbage disposal installation.
Old plumber’s putty effectively creates a watertight seal, preventing leaks from occurring between the drain flange and sink. When preparing to install a new garbage disposal, apply a generous amount of putty around the drain flange before pressing it into the sink drain.
This guarantees a tight seal when the mounting ring and disposal unit are secured. The step-by-step guide emphasizes the significance of this process as it helps maintain the integrity of the connection, avoiding potential water damage and guaranteeing that the disposal functions efficiently without leaks.
What to Know Before You Install a Garbage Disposal?
Before installing a garbage disposal, it is vital to gather necessary tools and materials, such as a screwdriver, plumber’s putty, and the appropriate mounting assembly.
It is also essential to turn off the water supply to prevent leaks and water damage during installation.
Consulting a plumber is advisable if the existing plumbing is complex or if there are concerns about compliance with local building codes.
What tools and materials are needed to install your garbage disposal?
To successfully install a garbage disposal, a specific set of tools and materials is crucial. The installation process requires precision and attention to detail, whether undertaken as a DIY project or by a professional plumber. Key components include a mounting ring and a drain plug, both integral for a secure fit under the sink. Electrical connections necessitate wire nuts and a screwdriver, guaranteeing the garbage disposal functions properly.
| Tools | Materials | Additional Needs |
|---|---|---|
| Screwdriver | Mounting Ring | Plumber’s Putty |
| Adjustable Wrench | Drain Plug | Electrical Tape |
| Wire Strippers | Garbage Disposal | Power Cord (if needed) |
These tools and materials guarantee a smooth installation process, resulting in a functional and efficient kitchen appliance.
Why should you turn off the water before installation starts?
Many homeowners underestimate the importance of turning off the water supply before starting a garbage disposal installation. In the installation process, turning off the water is critical to prevent potential leaks and water damage.
When plumbing the disposal, water flow can interfere, particularly when working underneath the disposal area. This interruption can complicate tasks such as attaching the disposal to the sink or connecting the drain. By guaranteeing that the water supply is off, the installer minimizes the risks of leaks during these steps.
It also provides a dry environment for securing connections. If water pressure remains active, any inadvertent movements might lead to unwanted water flow and further complications. Turning off the water guarantees a controlled and efficient installation process.
When do you need a plumber for a garbage disposal installation?
Guaranteeing the water supply is turned off is just one aspect of preparing for a garbage disposal installation.
A plumber should be consulted when complexities arise during installation. Common scenarios include:
- Replacing an existing garbage disposal: Professional assistance guarantees proper removal and installation.
- Difficulty removing the disposal from the mounting ring: Specialized tools and expertise may be required.
- Inadequate wiring to connect the electrical components: A licensed electrician may be needed.
- Issues sealing the pipe to the disposal: Proper sealing prevents leaks around the sink.
- Failure to drain for leaks: A professional can accurately test the garbage disposal for any leak issues.
Consulting a plumber can guarantee that the new garbage disposal unit is correctly attached to the mounting ring and operates efficiently.
What Are the Steps to Mount the Garbage Disposal Properly?
To mount the garbage disposal properly, one must first align the mounting ring with the sink flange, ensuring a secure and leak-free connection. If you already have a garbage disposal, the process may involve a straightforward garbage disposal replacement, reusing existing components where compatible.
Next, install one that suits your kitchen setup and plumbing layout. Carefully lift the disposal and attach it to the mounting assembly by aligning the disposal to the mounting ring, then rotating it into place until it locks securely.
The sink flange plays an essential role by providing a stable and sealed surface for the disposal, preventing leaks and ensuring efficient operation.
How do you align the mounting ring for proper garbage install?
Aligning the mounting ring accurately is essential for a secure and functional garbage disposal installation.
To mount the disposal effectively, one must first follow the manufacturer’s instructions to guarantee compatibility with the specific type of disposal being installed.
Begin by positioning the sink flange and the mounting assembly, making sure they align perfectly. The mounting ring should be positioned beneath the sink flange, allowing for an even fit.
Next, install the snap ring, making sure it is secured tightly. Verify that all components are aligned and secure before proceeding.
- Confirm the sink flange is correctly centered.
- Position the mounting assembly beneath the sink flange.
- Confirm the alignment of the mounting ring and sink flange.
- Securely install the snap ring for stability.
- Double-check alignment to verify a proper fit.
How can you mount the disposal and tighten it securely in place?
Following the precise alignment of the mounting ring, the next task involves securely fastening the garbage disposal unit itself.
To mount the garbage disposal, the installer lifts the unit, ensuring that it aligns with the mounting assembly. Once the disposal fits snugly, they rotate it counterclockwise until it locks into place.
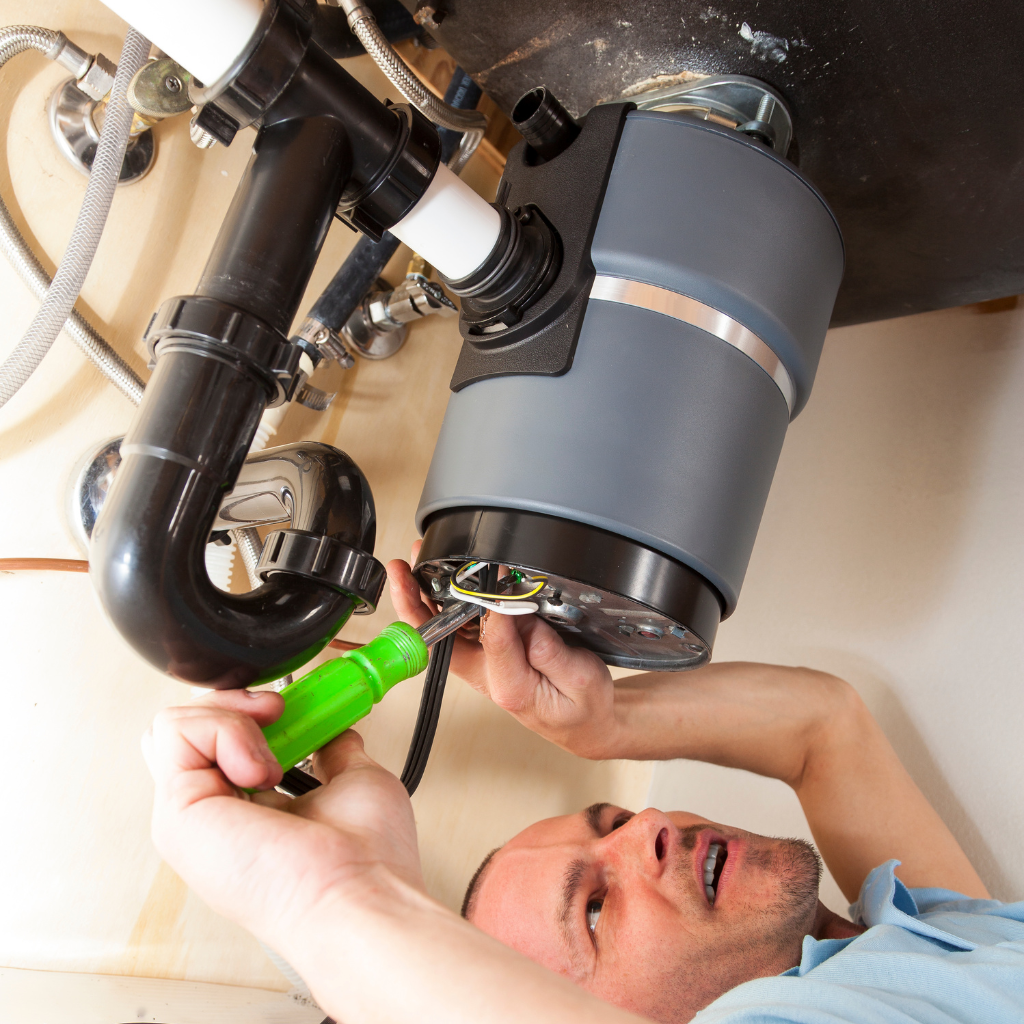
Using a screwdriver, they tighten it securely by engaging the screws while adhering strictly to the manufacturer’s instructions. Next, they wire the disposal, connecting it to the power source, ensuring that all connections are firmly positioned.
If applicable, the dishwasher drain is connected via the designated inlet. Finally, plug in the disposal and restore power to the disposal, ensuring the installation is complete and functional.
What is the role of the sink flange in mounting the disposal?
The sink flange serves as an essential interface between the sink and the garbage disposal unit, playing a pivotal role in guaranteeing a secure and leak-free connection.
During installation, the sink flange is mounted onto the sink drain, providing the necessary support and seal for the disposal unit. This step-by-step process involves aligning the flange with a gasket to prevent leaks and guarantee stability.
- Gasket Placement: Position the gasket between the sink flange and sink to create a watertight seal.
- Flange Alignment: Guarantee precise alignment of the sink flange with the drain to facilitate secure mounting.
- Support Bracket: Attach the support bracket to hold the flange in place.
- Tighten Mounting Screws: Secure the flange by tightening screws evenly.
- Leak Test: Verify the seal by testing for leaks after installation.
How to Wire the Disposal and Connect the Dishwasher Drain?
Properly wiring the garbage disposal involves connecting it to a dedicated electrical circuit, ensuring both safety and functionality. Many garbage disposals reduce kitchen waste efficiently, but they must be installed with care to operate reliably.
To connect the dishwasher drain, one must take the drain hose and attach it to the inlet on the disposal to help channel wastewater properly. Secure it with a clamp to prevent leaks.
Plumbing the system correctly is essential to prevent food waste leaks, which can lead to unpleasant odors and potential water damage.
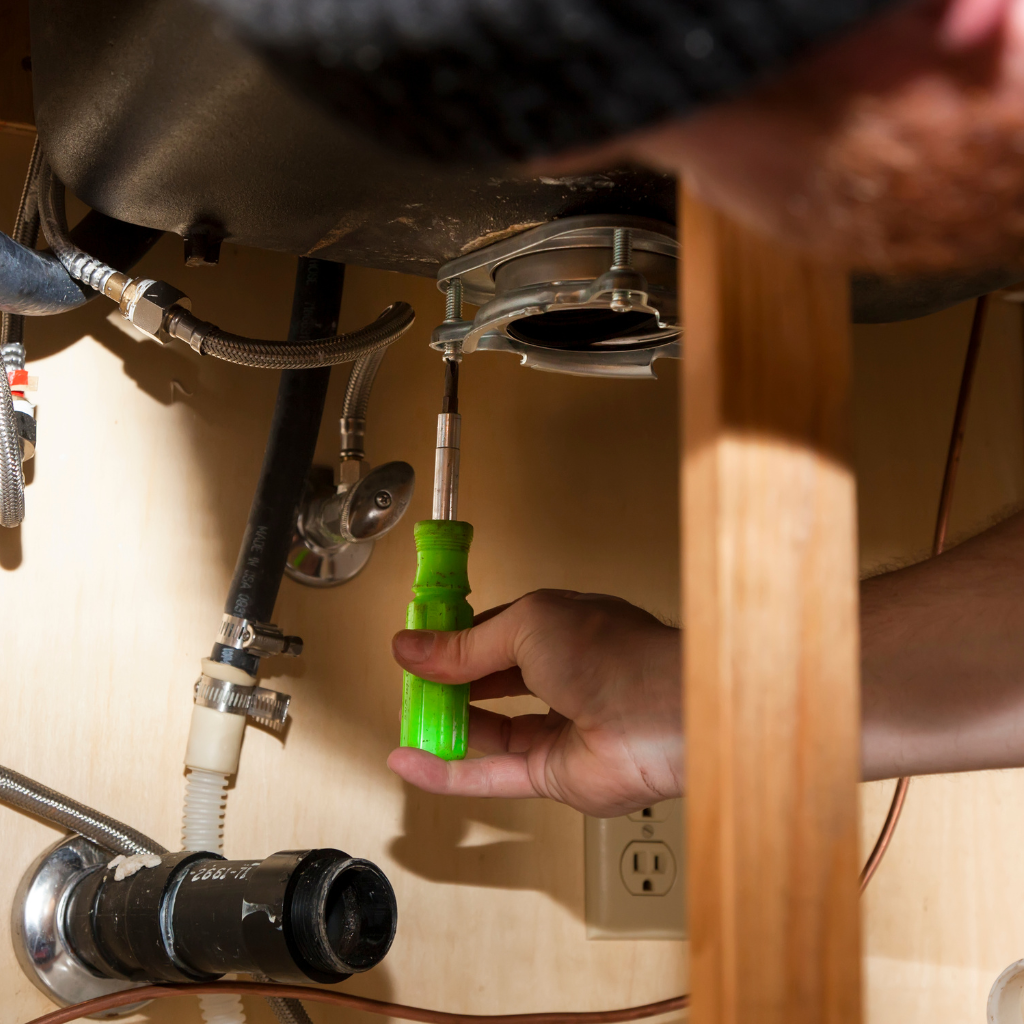
What steps are needed to wire the disposal correctly and safely?
Guaranteeing a safe and efficient wiring of a garbage disposal unit begins with disconnecting the power supply to prevent electrical hazards.
Following the manufacturer’s instructions is essential for safely executing the step-by-step instructions for installing the unit. First, confirm the circuit breaker linked to the disposal is off. Verify no power is reaching the disposal by testing with a non-contact voltage tester.
Then, establish the electrical connections as follows:
- Connect the ground wire securely to the green screw.
- Attach the white neutral wire to the corresponding white wire.
- Secure the black hot wire to the black wire coming from the switch.
- Confirm all wire connections are tight and insulated.
- Plug the disposal into the power outlet, then test the switch on the disposal.
Proper wiring guarantees power to the garbage disposal functions seamlessly.
How do you connect the dishwasher drain to the garbage unit?
Connecting the dishwasher drain to the garbage disposal involves a precise sequence of steps to guarantee effective drainage and prevent leaks.
First, verify that the disposal unit is installed and secure. Locate the dishwasher drainpipe on the side of the disposal unit. Remove the knockout plug inside this inlet using a screwdriver and hammer. This allows the dishwasher hose to connect properly.
Next, attach the dishwasher hose to the disposal unit’s drainpipe using a hose clamp. Confirm a tight seal to prevent leaks. Adjust the hose’s positioning to avoid kinks that could impede water flow.
Follow precise plumbing instructions to finalize the connection, verifying that each component is secure. This step-by-step process guarantees the dishwasher drain integrates seamlessly with the garbage disposal system.
Why is it important to plumb the system to prevent food waste leaks?
Once the dishwasher drain is connected to the garbage disposal, attention must shift to plumbing the system to prevent food waste leaks. Proper installation is vital to guarantee that food waste is efficiently processed and disposed of without causing leaks that could lead to water damage or health hazards.
A meticulous plumbing process is essential to maintain the integrity of the disposal system. Key elements in the plumbing process include:
- Sealing all joints and connections: Use plumber’s putty or sealant to guarantee airtight seals.
- Installing a P-trap: Prevents sewer gases from entering the home and traps debris.
- Using appropriate pipe sizes: Guarantees efficient flow and prevents blockages.
- Securing connections tightly: Minimizes the risk of leaks.
- Testing the system: Verifies that the installation is leak-free and operational.
What Are the Final Steps in the Garbage Disposal Install Process?
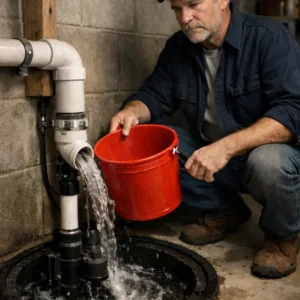
The final steps in installing a garbage disposal involve conducting a thorough operational test to guarantee functionality and address any leaks or connection issues. The process of installing a garbage disposal may seem straightforward, but attention to detail is essential to ensure long-term reliability.
The process includes running water through the system while activating the disposal unit to confirm efficient water and waste flow. Before doing this, it’s crucial to connect the disposal properly, ensuring all seals and fittings are secure.
Additionally, selecting the appropriate type of disposal unit is vital, as it must align with the user’s specific installation requirements and kitchen setup. Many units come prewired or with plug options — if the disposal comes with a power cord, proper electrical connection must also be confirmed. A garbage disposal may also require a dedicated power source, depending on the model.
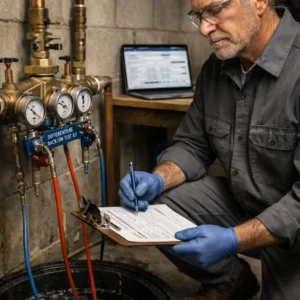
How do you test the garbage disposal after installation is done?
After successfully installing the garbage disposal unit, how does one guarantee it functions correctly? To confirm that the new disposal is operational after the installation process, follow these testing instructions carefully.
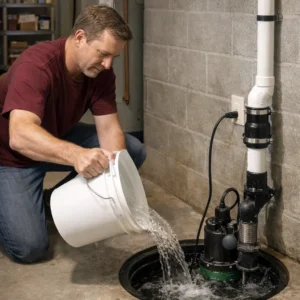
First, turn on the disposal to verify the electrical connection. Listen for any unusual noises that might indicate a problem. In addition, use the garbage disposal by running cold water and checking for leaks under the sink. This DIY approach helps in confirming the water-tightness of the unit.
Next, gradually feed small amounts of biodegradable waste to test the grinding function. Finally, replace a garbage disposal if persistent issues occur despite troubleshooting.
- Turn on the disposal and listen for abnormal sounds.
- Check for leaks beneath the sink.
- Run cold water to confirm proper drainage.
- Feed small waste for the grinding test.
- Inspect connections for security.
What are the step-by-step instructions for installing a garbage unit?
To guarantee a successful garbage disposal installation, attention to detail in the final steps is essential. After mounting the new garbage disposal unit, make sure the unit is securely fastened to the mounting assembly.
In the garbage disposal installation process, attach the discharge tube to the disposal’s outlet, securing it with a clamp.
For continuous feed garbage disposal or batch feed garbage disposal installations, connect the unit to the plumbing system by aligning the discharge tube with the drain pipe. Tighten all connections to prevent leaks.
Install a disposal by connecting the power supply, following the diy guide specifications. Test the unit by running water and activating the switch, verifying functionality. These precise step-by-step instructions ensure the disposal operates efficiently.
Which type of garbage disposal is right for your installation needs?
How does one determine the most suitable garbage disposal type for specific installation requirements? Selecting the appropriate garbage disposal involves considering several critical factors. The choice between a batch feed and a continuous feed unit depends on usage frequency and safety preferences.
Additionally, installation needs dictate alignment with the kitchen’s power source and sink compatibility. Noise level is a pertinent concern for those seeking quieter operations.
The grinding power and size of the unit should match the household’s waste volume and available space beneath the sink.
Finally, verify that the disposal is capable of a dishwasher connection if required.
- Batch feed vs. continuous feed
- Power source
- Sink compatibility
- Noise level
- Grinding power and size
Conclusion
Upon completing the installation, the user should verify that all components are securely fastened and that there are no leaks in the plumbing connections. The disposal unit must be tested for proper electrical operation by activating the power supply and running water through the system. Any unusual noises or vibrations should be addressed promptly to prevent damage. Proper installation guarantees efficient waste management and enhances kitchen hygiene, contributing to a smoothly functioning household environment.
")